Jun 13, 2016
Moving is expensive, man. Shoot. And now I need STUFF?! Instead of spending over $300 on some fancy headboards, I decided I was going to make one. And by "I" I mean "me and my husband."
"Husband and I" sorry, Mom.
Let's make a headboard!
The handsome hubby and I decided to give the headboard instructions from Chaney.
That’s an interesting name. Chaney.
Anyhow, she posted this shinnananage called How To Make an Upholstered Headboard {From a Curtain Panel}

And I picked it because it had real measurements. I know I never post amounts but. . .thanks Chaney!
This seems pretty easy. Some wood. Some board. Some foam. Some. . batting? WTF?
Step 1: Supplies!
We hit up Lowes for the:
It ended up the hardboard doesn't fit into my car so we bought belts and I held on to it on the roof as we zipped around town fearing the worse. We made it. Only one slightly meltdown. Otherwise, we got it home. Go us!
I ordered the Room Essentials™ Comfy Foam Mattress Topper form from Target $20.13
I order 6 yards Waverly Mini Muse Sage of fabric from Joann Fabric for $61.38. Why 6 yards? Because I read something on the Internet that that was how much I needed. I needed A LOT less. Pillows, anyone?
So - totally cost
Step 2: Assemble!
I can handle a hammer and nails so I went to our basement to assemble this headboard. Me and Mr. Lucky, the cat!
First, I laid out the wood. Lucky checked my work.

Yeah. . .something happened here. I am so bad with spacial stuff, I tried some other arrangements.

So, I guess something isn't right in the measurements from the website. I did get a tape measure and it seemed to all be right. . .I don't know how these wood pieces are suppose to work. Is my board too big?

Lucky's judgement was STRONG

Shut up, Cat! I'm working here! I followed the instructions to hammer the nail from the front of the headboard to the back.

Look at this fine nail job! I found these nails. They were longer than suggested, but, it was fine. The headboard will be sitting against a wall. Just need to make sure it doesn't fall apart.

By this time, my super-handsome husband came to help. He took one of the short boards and nailed it at the top of the headboard so we could nail the foam and fabric into it. The board is too thin to really hold up to much nailing.

So I hung out with the cat. We took selfies. . .

And judged the hubs. . .

And. .what was that sound?

So, the husband was done hammering stuff and we were ready to wrap stuff in foam. Once Lucky was done checking out stuff.

And being annoying. . .WE KNOW WHERE YOU ARE!

Ok, time to get to work! We laid the board on top of the foam and used spray adhesive and nails to secure it. The nails and glue worked really well! I tried to wrap the form symmetrically on both corners. I did not get any batting. .matting? Whatever that was. The foam was good enough, I think. I guess if we had the batting OVER the foam it would be smoother.
Oh. .OH. .that's why you do that. Haha.
Whatever, here's a picture of the gluing.

This was the fabric. Yes, it suppose to go up and down but it was too short. Bummer!

We decided we did not want a seam, so, we turned it sideways. I actually like this quirky take on this classic print! If you are going to get a fabric, it's probably best to get some that has a pattern that works in any direction. Unless you are REALLY good at cutting and matching up seams. As you might be able to tell from this post. and possibly this blog, I suck at most of these life skills.
Here is the hubs, hard at work! He has mad skillz!

Lucky was stalking a fly. . .so, we had some time.

Done and done! It was actually a pretty easy process. It could have been done by one person and really. . .it's an easy project!
We did not secure the fabric ALL around the headboard. It would hang fine without it - those most people on the Internet seem to run the foam and cloth around and secure it everywhere.
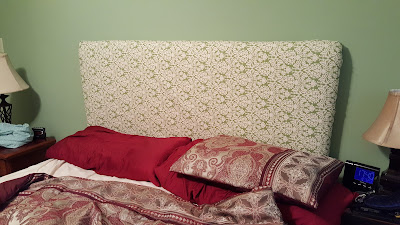
Here is the headboard in our room - we need new bedding. And have for a while. . .bought $60 worth of fabric, so . .soon.
Give this project a shot! It's pretty fun!

"Husband and I" sorry, Mom.
Let's make a headboard!
C: Is this a pintrest thing?
M: STFU
The handsome hubby and I decided to give the headboard instructions from Chaney.
That’s an interesting name. Chaney.
Anyhow, she posted this shinnananage called How To Make an Upholstered Headboard {From a Curtain Panel}
And I picked it because it had real measurements. I know I never post amounts but. . .thanks Chaney!
This seems pretty easy. Some wood. Some board. Some foam. Some. . batting? WTF?
Step 1: Supplies!
We hit up Lowes for the:
- Two 10' 2x4s cut down to four 54" lengths
- One 3/16" 48"x96" (4'x8') brown hardboard wall panel cut down to 48"x62"
Which came to $19.80.
It ended up the hardboard doesn't fit into my car so we bought belts and I held on to it on the roof as we zipped around town fearing the worse. We made it. Only one slightly meltdown. Otherwise, we got it home. Go us!
I ordered the Room Essentials™ Comfy Foam Mattress Topper form from Target $20.13
I order 6 yards Waverly Mini Muse Sage of fabric from Joann Fabric for $61.38. Why 6 yards? Because I read something on the Internet that that was how much I needed. I needed A LOT less. Pillows, anyone?
So - totally cost
- Wood: $19.80
- Foam: $20.13
- Fabric: $61.38 (Yeah, WAY to much fabric. I did get it 50% off, though)
- Total = $101.31
Step 2: Assemble!
I can handle a hammer and nails so I went to our basement to assemble this headboard. Me and Mr. Lucky, the cat!
First, I laid out the wood. Lucky checked my work.
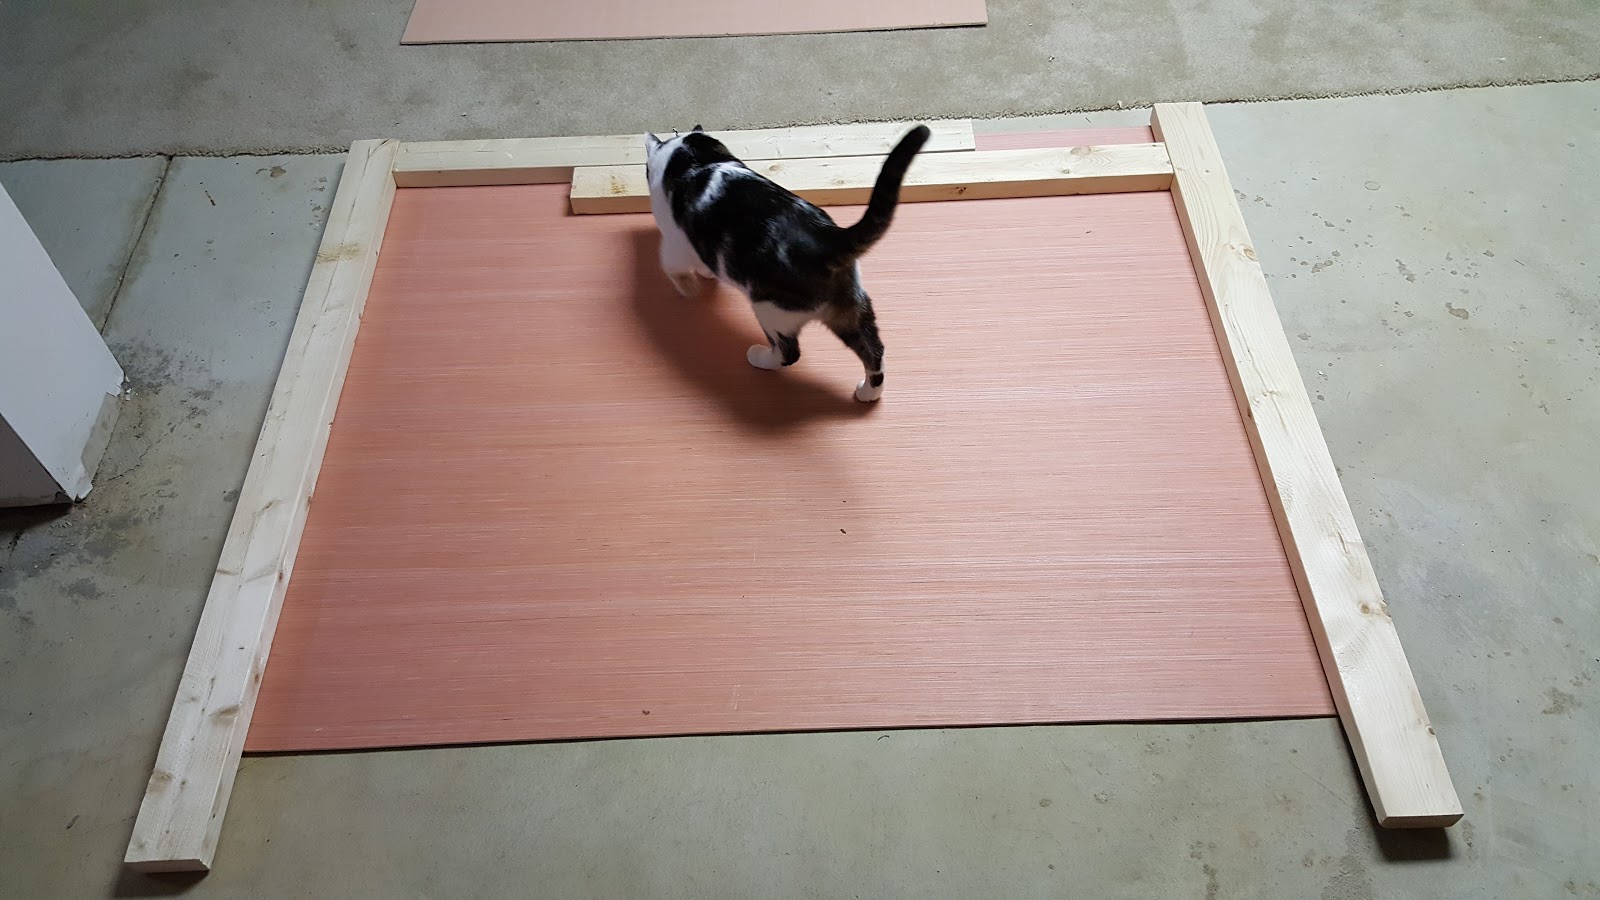
Yeah. . .something happened here. I am so bad with spacial stuff, I tried some other arrangements.

So, I guess something isn't right in the measurements from the website. I did get a tape measure and it seemed to all be right. . .I don't know how these wood pieces are suppose to work. Is my board too big?

Lucky's judgement was STRONG

Shut up, Cat! I'm working here! I followed the instructions to hammer the nail from the front of the headboard to the back.

Look at this fine nail job! I found these nails. They were longer than suggested, but, it was fine. The headboard will be sitting against a wall. Just need to make sure it doesn't fall apart.

By this time, my super-handsome husband came to help. He took one of the short boards and nailed it at the top of the headboard so we could nail the foam and fabric into it. The board is too thin to really hold up to much nailing.

So I hung out with the cat. We took selfies. . .

And judged the hubs. . .

And. .what was that sound?

So, the husband was done hammering stuff and we were ready to wrap stuff in foam. Once Lucky was done checking out stuff.

And being annoying. . .WE KNOW WHERE YOU ARE!

Ok, time to get to work! We laid the board on top of the foam and used spray adhesive and nails to secure it. The nails and glue worked really well! I tried to wrap the form symmetrically on both corners. I did not get any batting. .matting? Whatever that was. The foam was good enough, I think. I guess if we had the batting OVER the foam it would be smoother.
Oh. .OH. .that's why you do that. Haha.
Whatever, here's a picture of the gluing.

This was the fabric. Yes, it suppose to go up and down but it was too short. Bummer!

We decided we did not want a seam, so, we turned it sideways. I actually like this quirky take on this classic print! If you are going to get a fabric, it's probably best to get some that has a pattern that works in any direction. Unless you are REALLY good at cutting and matching up seams. As you might be able to tell from this post. and possibly this blog, I suck at most of these life skills.
Here is the hubs, hard at work! He has mad skillz!

Lucky was stalking a fly. . .so, we had some time.

Done and done! It was actually a pretty easy process. It could have been done by one person and really. . .it's an easy project!
We did not secure the fabric ALL around the headboard. It would hang fine without it - those most people on the Internet seem to run the foam and cloth around and secure it everywhere.
Here is the headboard in our room - we need new bedding. And have for a while. . .bought $60 worth of fabric, so . .soon.

Give this project a shot! It's pretty fun!
Subscribe to:
Post Comments (Atom)


0 comments:
Post a Comment